Wooden thermowall is one of the most popular choices for interior design and decorative wall facades, which not only brings the beauty of nature into the living or working space, but also, thanks to the thermowood process, has high resistance to moisture, decay, and temperature changes. But what plays a fundamental role in the final quality of this wooden wall covering is its principled and professional installation method. Many users are looking for detailed, step-by-step, and reliable information when searching for instructions on installing wooden thermowall or a guide to implementing wooden wall coverings. Today, in this article, we are going to review the thermowall installation. Stay with us.
What is Thermowall?
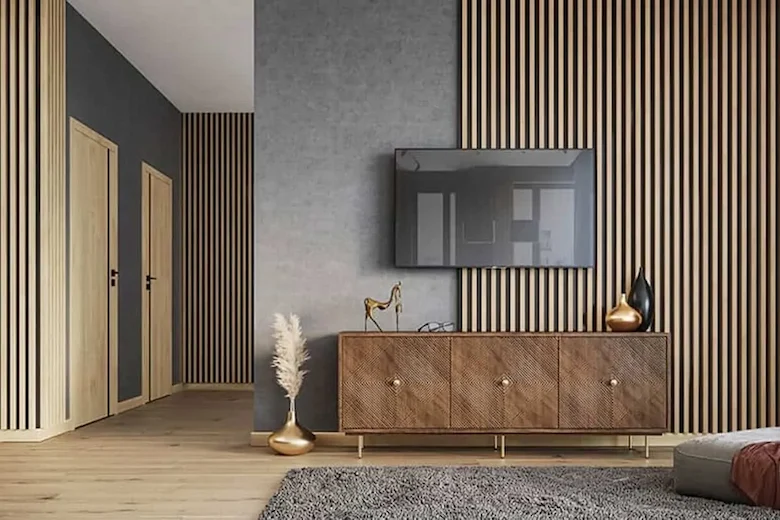
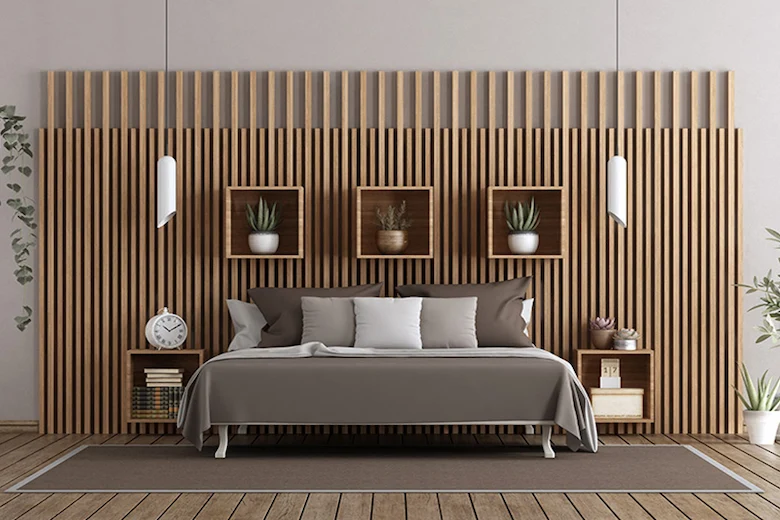
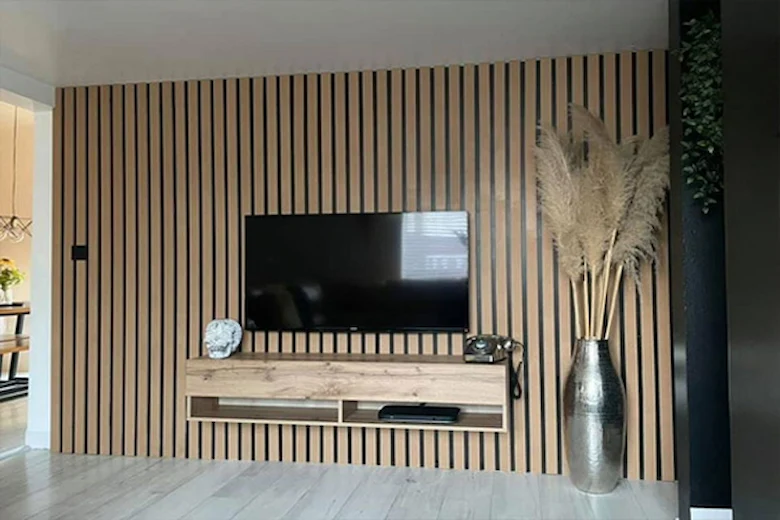
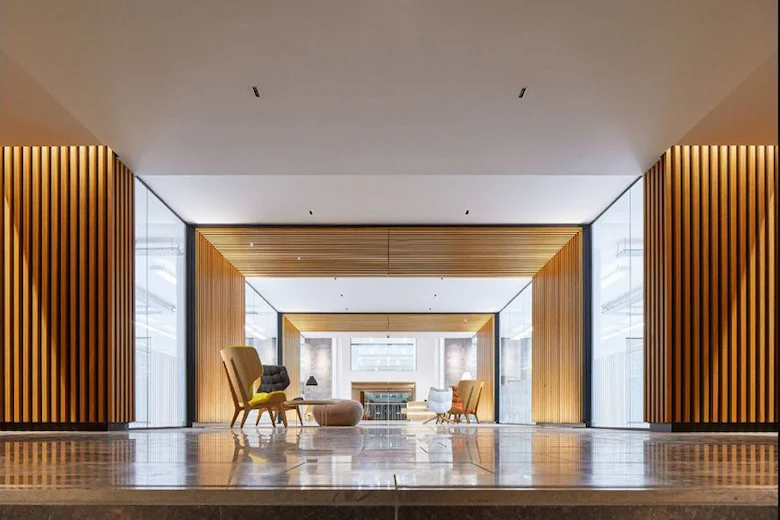
Wooden thermowall is one of the most modern and beautiful types of wall coverings that is made using processed natural wood (thermowood) and is widely used in interior design and building facades. In the process of producing wooden thermowall, wood is heated at high temperatures without the use of chemicals to significantly increase its durability, resistance to moisture, pests and temperature changes. This type of wall covering creates a luxurious and pleasant space with its warm and natural appearance and is therefore very popular in the interior design of homes, offices, shops and even commercial spaces and restaurants.
Also, wooden thermowall is an ideal option for spaces that need peace and energy saving due to its sound and heat insulation. Due to its beauty, high durability and easy installation, wooden thermowall is known as one of the best choices in the field of wooden wall coverings.

Thermowall Installation Guide
But you should note that thermowall installation requires a series of regular and predetermined steps to ultimately achieve the best result for you. Stay with us as we review the thermowall installation.
Preparing the Wall Surface
The first step in thermowall installation is to carefully and completely prepare the wall surface. The wall surface must be completely clean, dry, smooth, and free of bumps or depressions so that the wall covering can be placed on it properly. If the wall is uneven or damp, it is best to correct it by priming, sanding, or using special insulation. It is also very important to check the infrastructure and ensure that there are no leaks or moisture, because hidden moisture can damage the thermowall over time. At this stage, it is recommended to consult a wooden wall covering installation specialist so that the final result is completely standard and professional.
Measurement and Initial Design
Before cutting and thermowall installation, the wall must be accurately measured and the general installation plan must be determined. This step includes determining the location of each panel, calculating the number of pieces required, and determining the installation pattern (horizontal, vertical, or patterned). The initial design helps to avoid wastage of materials and to ensure that the final appearance is completely harmonious and beautiful. For high-quality interior decoration projects, using 3D design software to preview the final design of the wooden thermal wall can be very useful.
Installing a substructure or supporting frame
In many cases, thermowall installation requires the implementation of a wooden or metal frame or substructure on which the wooden panels are mounted. This substructure can be implemented in the form of horizontal or vertical wooden or metal profiles depending on the design. The distance between these frames is usually considered between 40 and 60 centimeters to bear the weight of the thermal wall and to provide proper ventilation between the main wall and the wall covering. Proper installation of the substructure has a direct impact on the durability and strength of the wooden wall covering and makes it resistant to pressure, impact and temperature changes.
Cutting Wooden Thermowall Panels
After designing and sub-construction, it is time to precisely cut the wooden Thermowall panels according to the measurements from the previous step. For this, it is best to use precise cutting tools such as a circular saw or a jigsaw so that the edges of the panels are completely smooth and even. While cutting, it is important to pay attention to the wood pattern and match it to the overall design so that the final appearance of the wall is uniform and beautiful. It is also very important to observe an expansion gap between the pieces of about 2 to 5 mm to prevent the wood from deforming due to changes in temperature and humidity.
Installing the panels on the wall
At this stage, the cut Thermowall panels are installed on the sub-construction using special wood adhesives, air nails, screws or hidden clips. The installation order is usually done from bottom to top or from one corner of the wall to the other. It is very important to pay attention to the alignment of the panels and the same distance between them, because the slightest irregularity can have a negative effect on the final appearance. If you use the clip system, the wall surface will be completely screw-free and will have a very clean and modern appearance. Using a laser leveling tool is also highly recommended at this stage to increase accuracy.
Applying the final coating and cleaning
After the wooden thermowall is fully installed, it is time for the cleaning and applying the final coating stage. At this stage, you can use special wood oils, protective varnishes or natural waxes to increase the resistance and color stability of the thermowall. In addition to increasing the durability of the wood, these coatings make the final appearance shinier and more elegant. After the final coating has completely dried, clean the surface of the thermowall with a soft cotton cloth to remove the dust remaining from the installation process. Paying attention to this stage will make the appearance of the wooden thermowall stay the same for a long time as on the first day.

Key points in thermowall installation
Paying attention to a series of simple but golden tips in the thermowall installation process can help you create a more beautiful and sustainable environment. These tips include:
Choosing high-quality thermowall
The first and most important point in thermowall installation is choosing quality materials. Thermowalls are made from various woods such as pine, spruce or poplar, and the quality of the wood, the way it is processed (thermowood), the uniformity of color, the absence of knots on the surface and their precise dimensions play a direct role in the beauty and durability of the project. Using poor-quality thermowall will cause warping, cracking or rotting over time. If you are looking for beautiful, durable and moisture-resistant wall coverings, be sure to use reputable brands and thermo-treated wood with European standards.
Respecting the expansion gap between panels
Wood is a natural material and is sensitive to changes in temperature and humidity; For this reason, it is absolutely necessary to observe the expansion gap when thermowall installation. If the pieces are installed without the proper gap, they may press on each other and warp or crack due to volumetric expansion. A gap of 2 to 5 mm between each panel (depending on the type and dimensions of the wood) helps ensure proper ventilation and increases the life of the wall covering.
Use a durable and level substructure
A standard and durable substructure is the foundation of a professional thermowall installation. Without a precise substructure, even the best thermal wall will not work well. The substructure is usually made of impregnated wood or metal profiles and must be perfectly level, moisture-resistant, and strong. Paying attention to the precise distance between the chassis (usually 40 or 60 cm) and their levelness prevents vibration or unevenness in the wooden panels.
Paying attention to the environmental conditions of the installation site
Another key point in thermowall installation is to carefully examine the environmental conditions of the installation site. Factors such as high humidity, direct sunlight, temperature fluctuations and air flow can affect the durability of wood. For example, in humid spaces such as bathrooms or kitchens, it is better to use waterproof coatings or indoor thermal insulation. Also, in outdoor spaces, the use of UV protective varnish or special wood oils is highly recommended. This attention makes the wooden thermal insulation have an attractive and long-lasting appearance in different conditions.
Using specialized tools and fittings
For the proper and professional thermowall installation, it is very important to use appropriate tools and specialized fittings such as hidden screws, air nails, metal clips, laser level and precise electric saw. Using non-standard tools can damage the wood or make the installation out of level. Also, using hidden clips helps to ensure that the final appearance of the wall is free of annoying screws and nuts and provides a completely modern and clean appearance.
Final Words
As you can see, in this article, we have thoroughly reviewed the thermowall installation guide. We learned that installing wooden thermowall, although it seems simple on the surface, requires careful and specialized attention to ensure both its visual beauty and the longevity and strength of the wood. From choosing the right material to observing the expansion gap, basic substructure, and choosing professional tools, all of these factors go hand in hand to achieve a worthy and durable result. By considering these items, you can use wooden thermowall not only as a wall covering, but also as a lasting element in decoration design. Thank you for your support.
Nobility Construction Group specializes in designing all types of LSF surfaces, construction consulting, property and asset management, designing and building all types of kit house and wooden thermowall. Dear friends, you can contact us for more information and free consultation.